Access Raspberry Pi With Public IP: The Ultimate Guide For Enthusiasts
Ever wondered how you could remotely access your Raspberry Pi from anywhere in the world? Well, you’re in the right place, buddy! Accessing Raspberry Pi with a public IP might sound like a tech wizard's trick, but trust me, it's simpler than it seems. With the right setup and a bit of know-how, you can turn your little Pi into a powerhouse accessible from any corner of the globe. So, buckle up because we’re about to dive deep into the world of remote access, public IPs, and all the cool stuff that comes with it.
Nowadays, everyone’s talking about remote access and how it can revolutionize the way we work, play, and automate our lives. Whether you're setting up a home server, running a media center, or just want to control your smart home devices, accessing your Raspberry Pi remotely is a game-changer. This guide will walk you through everything you need to know, from the basics to advanced configurations, so even if you're a newbie, you'll be up and running in no time.
But wait, there’s more! Security is a big deal when it comes to exposing your Pi to the internet. We’ll cover some best practices to ensure your setup is as safe as Fort Knox. So, whether you're a tech enthusiast, a hobbyist, or just someone curious about what Raspberry Pi can do, this article has got your back. Let’s get started, shall we?
- Johnny Manziel The Rise Fall And Redemption Of A Football Icon
- Unraveling The Mystery Of Josh Gates Hospitalized What Happened
Table of Contents
- What is Raspberry Pi?
- Why Use a Public IP for Raspberry Pi?
- Step-by-Step Setup Guide
- Understanding Port Forwarding
- Dynamic DNS: What It Is and Why You Need It
- Security Best Practices
- Troubleshooting Common Issues
- Must-Have Tools for Remote Access
- Alternatives to Public IP
- Conclusion and Next Steps
What is Raspberry Pi?
Before we dive into the nitty-gritty of accessing Raspberry Pi with a public IP, let’s take a quick look at what this little device actually is. The Raspberry Pi is a single-board computer that’s small, affordable, and incredibly versatile. It’s been a favorite among hobbyists, educators, and tech enthusiasts for years because of its ability to handle a wide range of tasks, from basic computing to complex projects like home automation and robotics.
Think of it as a tiny computer that you can tinker with and customize to your heart’s content. It runs on Linux-based operating systems like Raspbian, and with the right setup, it can act as a server, media center, or even a retro gaming console. So, yeah, it’s pretty awesome.
Key Features of Raspberry Pi
- Compact size and low power consumption
- Supports multiple operating systems
- Highly customizable and expandable
- Perfect for learning programming and electronics
Now that we’ve got the basics down, let’s move on to why you’d want to access your Raspberry Pi with a public IP.
- Discovering Austin Swift The Rising Star In Entertainment
- Exploring The Life And Career Of Amelia Heinle
Why Use a Public IP for Raspberry Pi?
Accessing Raspberry Pi with a public IP opens up a whole new world of possibilities. Imagine being able to control your smart home devices, access your files, or run applications on your Pi from anywhere in the world. Sounds pretty cool, right? Here are a few reasons why you might want to do this:
- Remote Access: Whether you're at work, on vacation, or just chilling at a café, you can access your Pi as if you were sitting right in front of it.
- Home Automation: Control your smart home setup from anywhere, making your life easier and more convenient.
- File Sharing: Use your Pi as a personal cloud server to store and share files with family and friends.
- Learning and Experimentation: If you're into coding or electronics, having remote access to your Pi allows you to experiment and learn without being tied to a specific location.
But, hey, before you go all gung-ho about it, remember that security is key. Exposing your Pi to the internet comes with risks, so we’ll make sure to cover that later on. For now, let’s move on to the exciting part – setting it all up!
Step-by-Step Setup Guide
Alright, let’s get our hands dirty and set up your Raspberry Pi for public IP access. Follow these steps carefully, and you’ll be good to go in no time.
What You’ll Need
- Raspberry Pi (any model will do)
- A stable internet connection
- A router with port forwarding capabilities
- A public IP address (or a dynamic DNS service)
Once you’ve got all that sorted, let’s dive into the setup process.
Step 1: Update Your Pi
Before we start, it’s always a good idea to make sure your Pi is up to date. Open a terminal and run the following commands:
sudo apt update && sudo apt upgrade
This will ensure that all your packages and software are the latest versions.
Step 2: Configure SSH
SSH (Secure Shell) is the protocol we’ll use to access your Pi remotely. To enable SSH, you can either do it through the Raspberry Pi Configuration tool or by creating an empty file called "ssh" on the boot partition of your SD card.
Once SSH is enabled, you can test it locally by running:
ssh pi@
If everything works, you’re ready to move on to the next step.
Understanding Port Forwarding
Port forwarding is like creating a tunnel that allows traffic from the internet to reach your Pi. It’s a crucial step in setting up public IP access, so let’s break it down.
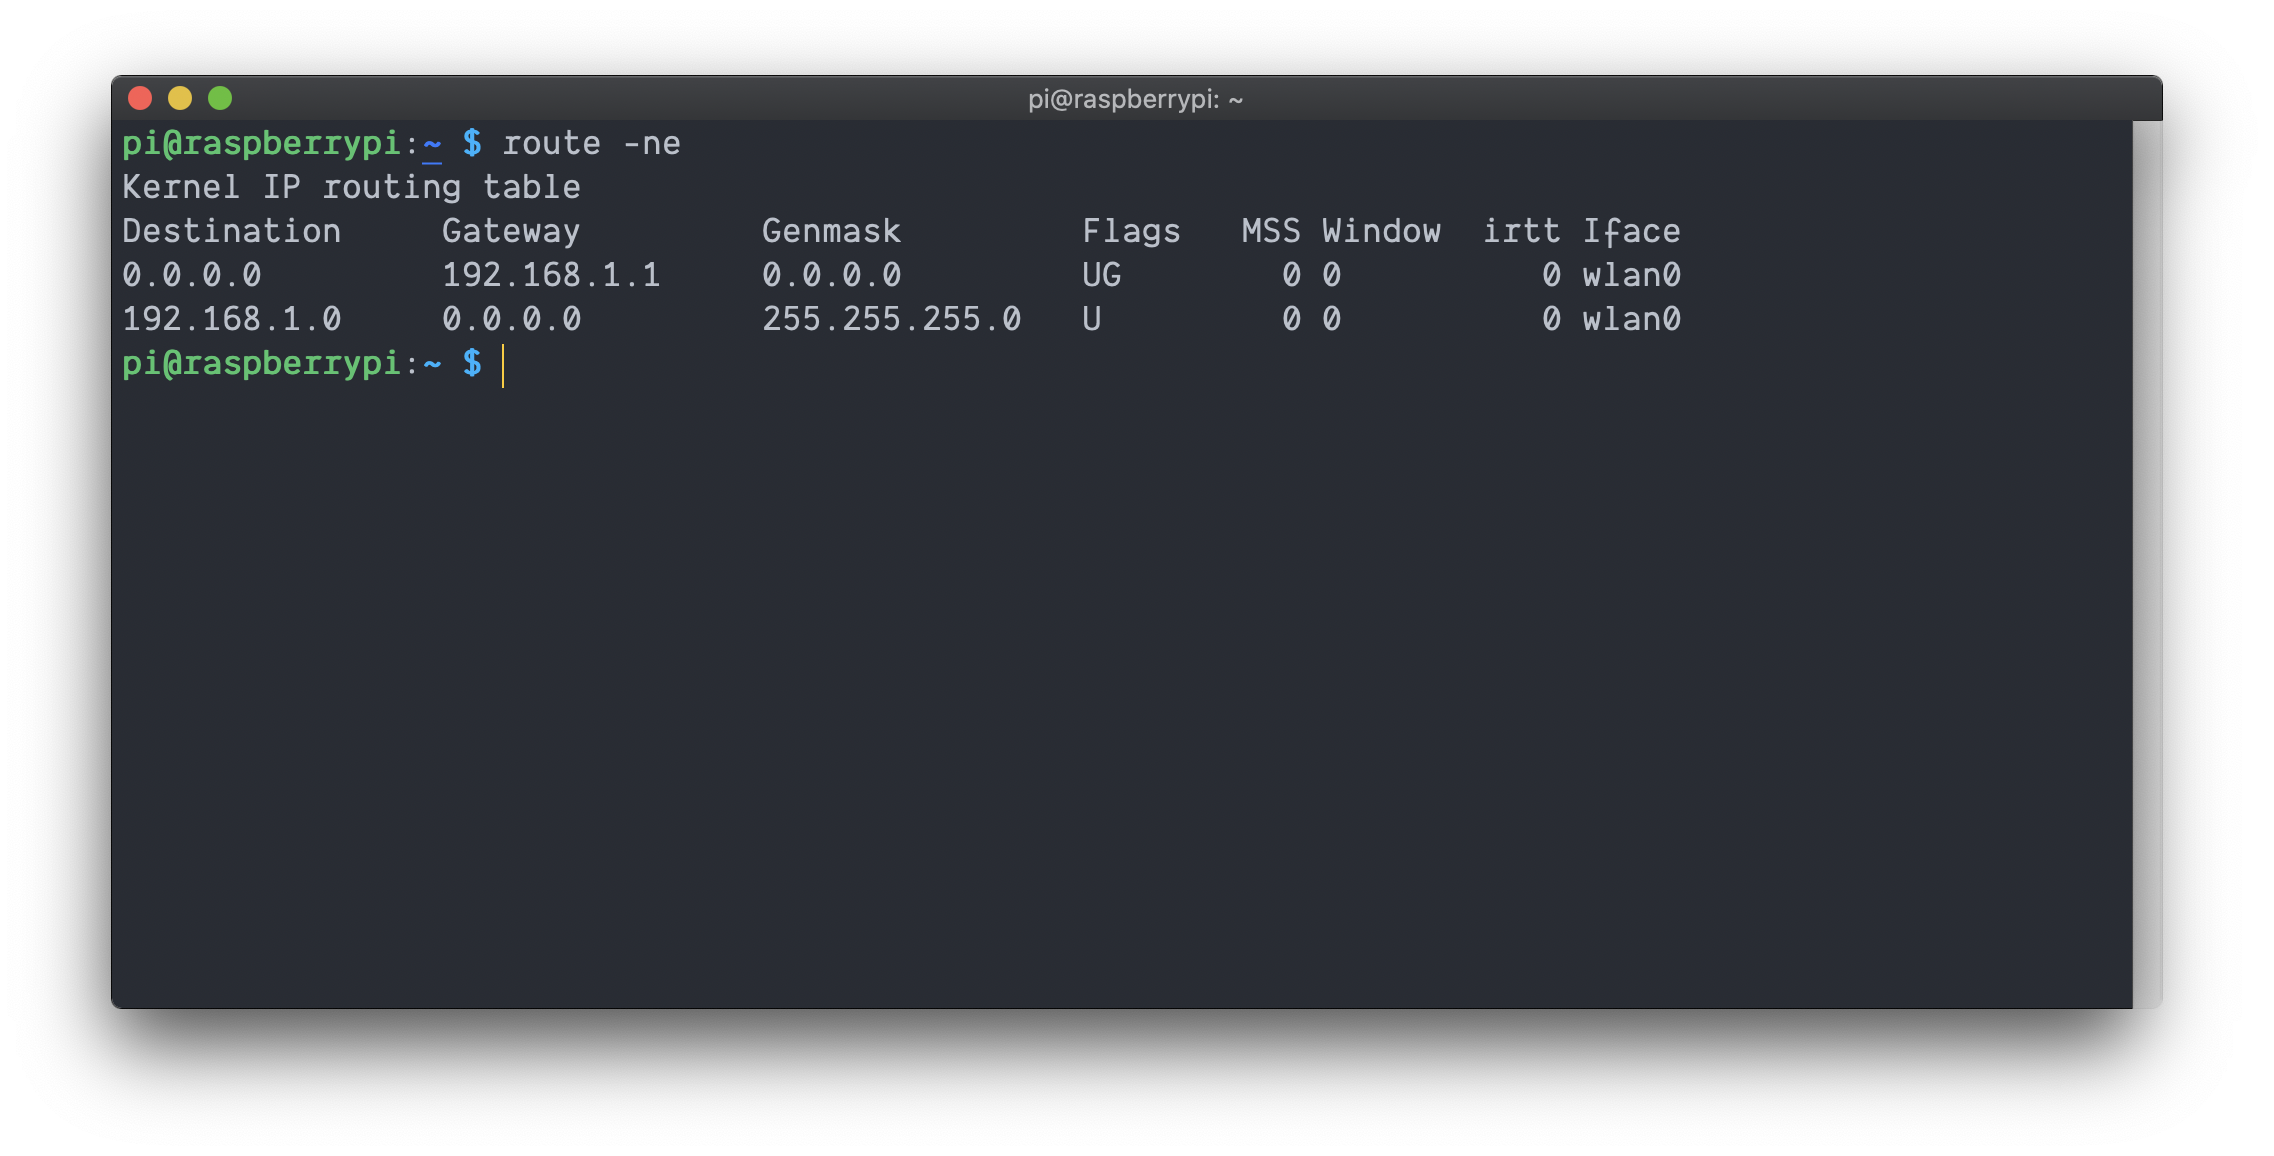
Head over to your router’s admin interface (usually accessible via 192.168.0.1 or 192.168.1.1) and find the port forwarding section. Add a new rule that forwards port 22 (the default SSH port) to the local IP address of your Pi.
For example:
- External Port: 22
- Internal Port: 22
- IP Address:
Save the settings and test it by trying to SSH into your Pi using your public IP address:
ssh pi@
If you can connect, congratulations! You’ve successfully set up port forwarding.
Dynamic DNS: What It Is and Why You Need It
Public IPs can be a bit tricky because they often change, especially if you’re using a residential internet connection. This is where Dynamic DNS (DDNS) comes in. DDNS services like No-IP or DuckDNS allow you to assign a hostname to your Pi that updates automatically whenever your public IP changes.
Here’s how to set it up:
- Sign up for a DDNS service and create a hostname.
- Install the DDNS client on your Pi and configure it with your account details.
- Test the setup by pinging your hostname to see if it resolves to your public IP.
With DDNS, you’ll always have a reliable way to access your Pi, even if your IP changes.
Security Best Practices
Now that we’ve got the setup part down, let’s talk about security. Exposing your Pi to the internet comes with risks, but there are plenty of ways to mitigate them. Here are some best practices to keep your setup safe:
- Change the Default SSH Port: Instead of using port 22, choose a random high-numbered port to reduce the chances of automated attacks.
- Use Strong Passwords: Make sure your Pi’s password is strong and unique. Better yet, disable password authentication altogether and use SSH keys instead.
- Install a Firewall: Tools like ufw (Uncomplicated Firewall) can help you control incoming and outgoing traffic to your Pi.
- Regularly Update Your Pi: Keep your software up to date to protect against vulnerabilities.
By following these practices, you’ll significantly reduce the risk of unauthorized access and keep your Pi safe.
Troubleshooting Common Issues
Even with the best setup, things can sometimes go wrong. Here are some common issues you might encounter and how to fix them:
- Can’t Connect via SSH: Double-check your port forwarding settings and make sure your Pi’s firewall isn’t blocking the connection.
- IP Address Keeps Changing: If your public IP changes frequently, consider using a DDNS service as mentioned earlier.
- Slow Connection: Optimize your network settings and ensure your internet connection is stable.
If you run into any other issues, don’t hesitate to reach out to the Raspberry Pi community or forums for help.
Must-Have Tools for Remote Access
Having the right tools can make remote access a breeze. Here are a few must-haves:
- Putty: A popular SSH client for Windows users.
- FileZilla: For secure file transfers via SFTP.
- TeamViewer: If you prefer a graphical interface, this tool allows remote desktop access.
These tools will make your life easier and ensure a smooth remote access experience.
Alternatives to Public IP
If exposing your Pi to the internet isn’t your cup of tea, there are alternatives you can consider:
- VPN: Set up a secure tunnel between your Pi and your device using a service like OpenVPN.
- Reverse SSH Tunnel: This allows you to connect to your Pi without exposing it directly to the internet.
- Cloud Services: Use platforms like AWS or Google Cloud to host your applications and access them remotely.
These alternatives offer different levels of security and complexity, so choose the one that best fits your needs.
Conclusion and Next Steps
Accessing Raspberry Pi with a public IP might seem intimidating at first, but with the right setup and a bit of caution, it’s a powerful tool that can enhance your projects and simplify your life. From remote access to home automation, the possibilities are endless.
So, what are you waiting for? Grab your Pi, follow the steps in this guide, and start exploring the world of remote computing. And remember, if you ever get stuck, there’s a whole community of enthusiasts ready to help you out.
Don’t forget to leave a comment or share this article if you found it helpful. Happy tinkering, and see you on the next project!

Raspberry Pi for industry Raspberry Pi
Assigning a static IP to your Raspberry Pi Hello, friend.
How to set up static IP in raspberry pi
